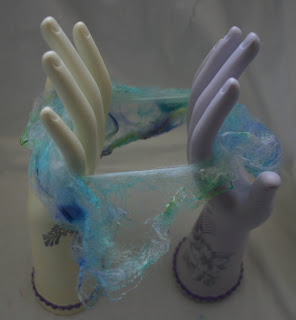
Silk hankies or Muwata come in squares, which are actually the silk cocoons stretched over a square frame and then layered and layered until they look like this.
When you pull the layers apart it looks like this. This is probably 3 or 4 layers of silk cocoons.
This is what a single layer looks like. It is much easier working with a single layer if you would like a finer yarn. Though it does start out fairly thick, so don't worry you can still get a medium weight yarn this way too.
Next put your fingers through the center of the hanky and pull out until your hands can fit through the center. Continue pulling, making sure to rotate the hanky from time to time to get it as even as possible. The fiber will end up thick and thin in the end, but you still want it as even as possible.
Eventually your hanky will start to look like this. You can go through and tug on areas that are thicker to thin even them out with the rest of the fiber.
If you want to know how thick your fiber is use a Wraps Per Inch (wpi) tool, or if you don't have one, try a ruler. Wrap the fiber around evenly, not too loose, not too tight for at least 2 inches, then divide by 2 to get the wraps per inch. The wraps should lie right next to one another, not scrunched together or with big gaps in between. To figure out what your wpi means I found a chart on Ravelry, or basically:
5 to 6 wpi = Super Bulky
7 = Bulky
8 = Aran
9 = Worsted
11 = DK
12 = Sport
14 = Fingering
16+ = Lace
Wind the resulting fiber around a paper card of some kind. I used a business card, but you could also use an index card or other scrap of heavy paper. It is important to wrap it around something smooth which won't catch on the silk. DO NOT wrap it into a ball on itself, because this will make a tangled mess in the middle, which will be very difficult to work with.
If you wish to do all of your hankies at one time, you can continue to wrap them around the card one on top of the other. It can get a little rough on your hands to do it all at one time, so be careful and take breaks as necessary. Also you can stretch one layer of the hanky at a time as you need it for your project. I just got carried away with how much fun it was to see the colors all stretched out.
When you are through you are ready to either spin it into yarn or knit with it. This is the end for the spinning tutorial. The rest is all about knitting. As with any handspun or thick & thin yarn, make sure to knit an ample gauge swatch to see how your yarn behaves. A 4 x 4 swatch should be enough. Depending on your project or your preferences you may wish to block the swatch as well.
This is the end of the tutorial. Next time I'll show you the project I knit out of my silk hankies!
I will have the finished project as well as all of the hankies, while they last, at Black Sheep this weekend! We will be in room 3, booth #39, on the same row as Blue Moon and Dicentra. Make sure to stop by and check them out!


