Showing posts with label Tutorial. Show all posts

Wednesday, October 03, 2012

How to Tell if a Fiber is Superwash or Not...

or when in doubt get out the power tools!

I have a bit of a story to tell you today with lots of pictures! So a month or so ago I received a big order from a customer for Merino/Tencel Roving in a variety of colors. She makes felted art scarves, so it was very important it was Merino and not Superwash Merino. Well her order cleared out all the undyed fiber I had on hand and I had to order more. Roughly 8oz more for her order, plus more to replenish my stock on hand. 

Well, I got more of what I thought (and my supplier thought) was Merino/Tencel, only it wasn't. I received an email from my customer saying that 8oz was actually superwash and wouldn't work. So I contacted my wonderful supplier and they sent me more, saying they were sure it was Merino/Tencel. This time, to make sure I got out the power tools! Here is a sure fire way to tell if your fiber is superwash or not!


First take a small piece of fiber and dip it into some warm soapy water. Then squeeze it so it isn't too wet.
  

Then get out your electric sander. Make sure it is the vibrating kind, not the belt kind. Also make sure you plug it into a GFCI outlet, just in case. I plugged it into one in my kitchen. There isn't much water involved, but it's better to be safe than sorry! 

Put your bit of fiber onto a cookie sheet. Then turn the sander on and apply it to the sample. For these I moved it back and forth across the fiber for 1 minute on each side. Here are the results:


Merino Wool. I started with this one since I learned this technique in college and I wanted to make sure I was doing it right. Merino felts very easily, so this was a great sample to start with. This is Citrus, which I will dye upon request.


Merino / Tencel. From some fiber I had on hand from before. I knew this was Merino/Tencel and sure enough it felted up really nicely, even nicer than the straight merino. This is Owen, which I plan on dyeing more of very soon. Isn't it a gorgeous colorway?!


Superwash Merino / Tencel. Ever wonder what superwash really does when you try to felt it? Well wonder no longer. As you can see the fibers don't stick together and it's one matted lump. I could pull this back apart and spin it if I wanted to. It didn't change one bit from its previous form. This is Berry Pie. 


So, here is my mystery fiber I got from my supplier. I actually did this 2 minutes on each side, just to be extra cautious and give it every chance it could have. Now looking at the samples above to compare it, which one does it look like to you? It looks very much like the Superwash Merino / Tencel to me. So I emailed my supplier and they were hugely apologetic. They got immediately on the phone to the mill and ordered up a brand new batch of Merino/Tencel. 

 
So, when the new shipment arrived this week they sent me a little felted ball, which they tested in house. However, I couldn't resist getting out my sander again for a little test. This was one minute on each side and ta-da it looks just like how it should look. So if you have ever wondered whether the Merino/Tencel Roving I carry is really plain Merino, it most certainly is! Also if you have mystery fiber in your stash which you can't remember whether it is superwash or not, just get out the power tools and test it out!

Thursday, June 23, 2011

Silk Hanky (Muwata) Tutorial

I am introducing a brand new product, silk hankies, and I thought I would do a quick tutorial on how to work with them, both for spinning and knitting. Here goes:

Silk hankies or Muwata come in squares, which are actually the silk cocoons stretched over a square frame and then layered and layered until they look like this.


When you pull the layers apart it looks like this. This is probably 3 or 4 layers of silk cocoons.


This is what a single layer looks like. It is much easier working with a single layer if you would like a finer yarn. Though it does start out fairly thick, so don't worry you can still get a medium weight yarn this way too.


Next put your fingers through the center of the hanky and pull out until your hands can fit through the center. Continue pulling, making sure to rotate the hanky from time to time to get it as even as possible. The fiber will end up thick and thin in the end, but you still want it as even as possible.


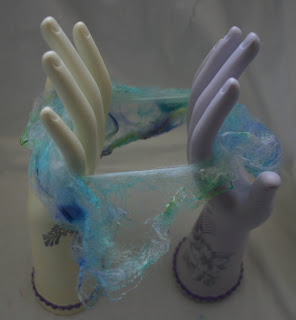
 Eventually your hanky will start to look like this. You can go through and tug on areas that are thicker to thin even them out with the rest of the fiber.


If you want to know how thick your fiber is use a Wraps Per Inch (wpi) tool, or if you don't have one, try a ruler. Wrap the fiber around evenly, not too loose, not too tight for at least 2 inches, then divide by 2 to get the wraps per inch. The wraps should lie right next to one another, not scrunched together or with big gaps in between. To figure out what your wpi means I found a chart on Ravelry, or basically:
5 to 6 wpi = Super Bulky
7 = Bulky
8 = Aran
9 = Worsted
11 = DK
12 = Sport
14 = Fingering
16+ = Lace

Continue to stretch the hanky until you reach the desired size for your yarn. This is true whether you are knitting or spinning, because the silk is difficult to draft while spinning, so if you can get it as close as possible to your desired yarn size, then you will have much less difficulty spinning it. Break the circle apart by pulling on it until it breaks, creating 2 ends.

Wind the resulting fiber around a paper card of some kind. I used a business card, but you could also use an index card or other scrap of heavy paper. It is important to wrap it around something smooth which won't catch on the silk. DO NOT wrap it into a ball on itself, because this will make a tangled mess in the middle, which will be very difficult to work with.

If you wish to do all of your hankies at one time, you can continue to wrap them around the card one on top of the other. It can get a little rough on your hands to do it all at one time, so be careful and take breaks as necessary. Also you can stretch one layer of the hanky at a time as you need it for your project. I just got carried away with how much fun it was to see the colors all stretched out.

When you are through you are ready to either spin it into yarn or knit with it. This is the end for the spinning tutorial. The rest is all about knitting. As with any handspun or thick & thin yarn, make sure to knit an ample gauge swatch to see how your yarn behaves. A 4 x 4 swatch should be enough. Depending on your project or your preferences you may wish to block the swatch as well.

This is the end of the tutorial. Next time I'll show you the project I knit out of my silk hankies!

I will have the finished project as well as all of the hankies, while they last, at Black Sheep this weekend! We will be in room 3, booth #39, on the same row as Blue Moon and Dicentra. Make sure to stop by and check them out!